
For the trans I'm just going to open it up, do a thorough clean up and polish and replace the seals.
I'm having the frame, front end and wheels/sprockets sandblasted and powder coated. It will be a little pricey but that stuff don't scratch or rust.
For the tank I'm soaking it in acid to eat out all of the rust and then I'll seal it with a liquid sealer we sell where I work. I've used this stuff in the past on tanks much worse than this one and it is an amazing product. Once I locate a front fender I will have the tank and fenders repainted the original orange color. I'm really considering making my own front fender. I used to work in sheetmetal and it is a bone simple design.
Another thing I'm going to try my hand at is reproducing all of the original decals. You can buy decal paper that uses a regular copier (laser or dry ink) to make your own decals. I do a little graphic work on my Mac and I have all of the old ones to use as templates. Who knows, if it works I may go into the Rokon label business :-).
I'm also going to make a new seat using the old one as a pattern. I've got some new black upholstery material from a Polaris ATV seat that is real good thick stuff and foam rubber has come a long way in the last 25 years. I will also make the seat bottom out of thick aluminum instead of the plywood like the original. ( I think I've been watching too much Martha Stewart :-) ).
Well, anyway those are my plans and by chapter three I should be pretty well along. I still haven't located a front miter box but I'm a-lookin' ! :-).
 | A shot of the left side after steam cleaning. |
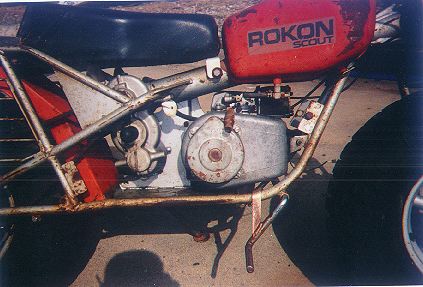 | A shot of the right side after steam cleaning. |
 | Here's a shot of a Rokon after hitting a land mine. It came apart very easily with no frozen bolts. I plan to replace all the hardware with stainless steel. |
 | The wheels are very straight and the sprockets show little wear. The wheel bearings however are rusted junk. I'll be replacing those and getting the wheels powder coated. |
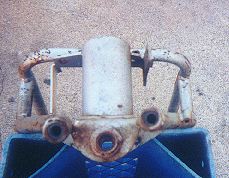 | The handlebar mounts on the front forks are a little tweaked, the forks themselves however appear to be straight. I'm also going to modify the pivot bolts for grease zerks. The front miter box , brake assembly and driveshaft are missing :-(. |
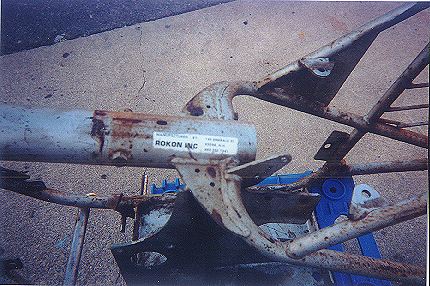
 | A shot of the frame. All original with no mods. The rear cargo rack is bent down slightly but will be easy to fix. I'll be getting it sandblasted and powder coated. |
| The plunger transmission. I thought it had a bad second gear but after working the plunger a few times it started shifting like butter. I do plan on replacing the seals and grease. The sprocket looks like new. The brake disc is rusty but usable and the pucks have a lot of material left. The actuator pins are stuck but a little WD 40 ought to fix that. While I have it apart I'll beadblast the case and replace the case screws with stainless steel allen heads. | |
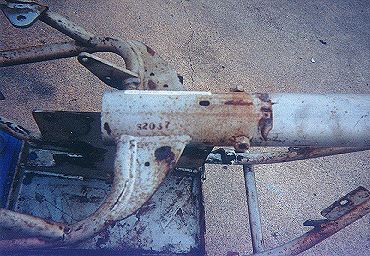 | Here's a good shot of the frame numbers. |
 | This is one of the decals I will try to reproduce. |
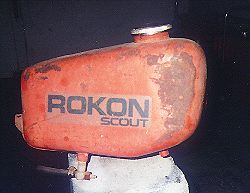 | The gas tank has numerous pin holes rusted in it and a road rash dent on the front right corner. Some tank seal and bondo ought to fix it right up. The original gas cap is in good shape but the petcock is junk. I will be building rubber isolation mounts for it and try to reproduce the decals. It has a neat little one by the gas cap that gives fuel ratios and choke instructions. |
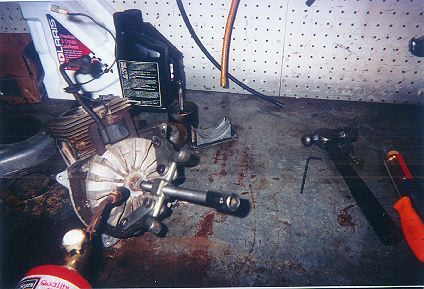 | The flywheel was the only part that gave me grief. That puppy was STUCK ! See the next pic for all the tools I had to use to remove it. |
 | The tools I used to remove the flywheel. ( not shown is the bucket of sweat ). |
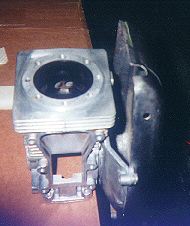 | The polished block and fan cover. I'll be reassembling the motor with all stainless steel allen bolts and screws. |
 | All the parts fit under my bench. I am amazed at the elegant simplicity of these machines. |
 Click the poster to see my parts wanted list. |
 |
 Help support Manyringding Buy a KEEP ON ROKIN "T" SHIRT ! |
I can be contacted HERE