Well, the bike is done and what a long strange trip it's been. It's taken almost a year to rebuild but I can definatly say it's been worth it. When I started this project I knew next to nothing about Rokons and now I have become something of an expert. I've met many great people in my quest for knowledge (and parts) from all over the country. From Bob Gallagher in Hawaii to Harold White in Alaska, Orla Larsen (the founder of Rokon), Dusty, Glenn, Rick, Tom, Jeff, Dave, Randy, Jim, Nate, Don, Monte and Mark and a whole bunch of other guys who love Rokons as much (or more) than me. I couldn't have done it without them, literally. THANKS GUYS !
  In fact as I write this I am preparing for a trip to West Virginia (some 1500 miles from here) for my first Rokon gathering. It should be a blast and I'll be posting pictures of it in Chapter Seven along with some pics of ManyRingDing gettin' down and dirty :-).
  O.K. , let's get started with Chapter Six. These pics are from various stages at the end of the build. I wound up painting the bike black which looks pretty good in my opinion but I have a feeling that come winter I might just go with a brighter color. I temporarily installed the Red body work off my 72 Trailbreaker and really liked how it looked, so who knows. The motor turned out really well and isn't the least bit finicky. Starts easily and has a lot more power than a stocker.
  I built some neat folding footpegs and worked out a rubber isolation mounting system for the gas tank. One modification that took a lot of thought was the addition of a carbureater primer system I had to build because the high performance carb I used doesn't have a choke. I used a primer bulb off a weedeater and custom built a petcock with an extra fuel tap to feed it and made a spray bar that mounts through the side of the air filter mount/velocity stack. It works very well. To start the bike I turn on the ignition, set the compression release, hit the primer a couple times and pull the handle. Fires right up :-).
  One thing I did right at the end was to replace my custom made expansion chamber with a muffler off an 85 Trailbreaker. I really liked the power and sound of the expansion chamber but IT WAS VERY LOUD. I'm saving it for squirrel season. I figure a couple of high speed passes through the woods and I'll be able to pick the little buggers up off the ground where they fell out of the trees stunned ;-).
Stay Tuned !

In this pic you can see the grease fitting I added to the top steering head bushing. The bottom one has one too. They should help prolong the life of the bushings. If you look real close you can also see the plastic dust/water cover cap I put over the top bolt. Mark Peterson has a good article covering this modification at his RockOnline website. Click HERE to go to his modifications page.
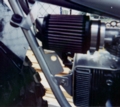
Here you can see the custom high speed needle adjusting wheel that came off the Ultra-Lite plane motor on the HL334 carb . It sure does make it easy to dial in the carb while riding. You can also see the K$N air filter and custom petcock with the extra fuel tap for the carb primer I had to add.
Another shot of the filter. You can also see the rubber tank mounts without the tank in the way.
This is a shot of the front chain guard.
A 3/4 shot from the front.
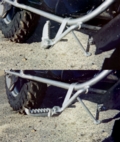
Here are the folding footpegs I made. They are some old solid aluminum aftermarket motocross pegs welded to the stock swing pegs.
A better shot of the custom petcock and primer bulb.
As much as I liked the power and sound of the expansion chamber I built, I decided to go ahead and put a muffler on it. This exhaust came off an 85 Trailbreaker and was originally a plastic Acerbis. This pipe has had the plastic muffler cover (which was prone to melting) replaced with a sheetmetal cover. It is MUCH quieter and doesn't really rob that much H.P.
Just a couple of little details. I put a chrome plug in the hole for the power take off and if you look REAL close you can see the grooving I added to the shift knob for a better grip.
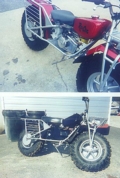
I took these shots after the black bodywork came back from the painters. While it was being painted I wanted to ride it to check out the motor etc. so I temporarily installed the red tank, seat and fenders off my 72 Trailbreaker. Looks pretty damn good :-).
Here's the finished bike sitting in my backyard.
A rear shot of the seat. Kinda says it all ;-).
Another shot of the tank mounts and primer bulb. I had to add the primer because the HL334 carb doesn't have a choke.
Here are the pieces that make up the tank mounts. They originally were rear tank mounts from a Suzuki LT250 ATV.


Click the poster to see my parts wanted list.

Help support Manyringding
Buy a KEEP ON ROKIN "T" SHIRT !

go back to top of page


[ home ]   [ chapter one ]   [ chapter two ]   [ chapter three ]   [ chapter four ]   [ chapter five ]   [ chapter six ]
[ chapter seven ]   [ parts wanted ]   [ links ]   [ the tribe ]   [ techie stuff ]

Coming Soon !
Chapter Seven
WE RIDE !!

I can be contacted HERE